
Adding a Segmented Control Programmatically
January 26, 2015While learning iOS programming, it was interesting to try and figure out building a custom Segmented Control and programmatically adding it to a view. It gives an interesting experience to see how the pieces work together. Just a disclaimer, I am still learning Swift and iOS programming and these may not be the best practices but I hope it provides some interesting insights for others who are learning!
Introduction
I will be going through a simple application that uses a Segmented Control that is programmatically added to the view and allows changing the background of the view. As some quick set up:
- Create a new single page application for iOS.
- Make sure to be using Swift as the language.
- You can leave Core Data unchecked as we do not need it.
The End Results
The following is a preview of the end result with 2 frames of the application. On the left you see the default state when loaded and on the right you see what happens when "Green" is selected.
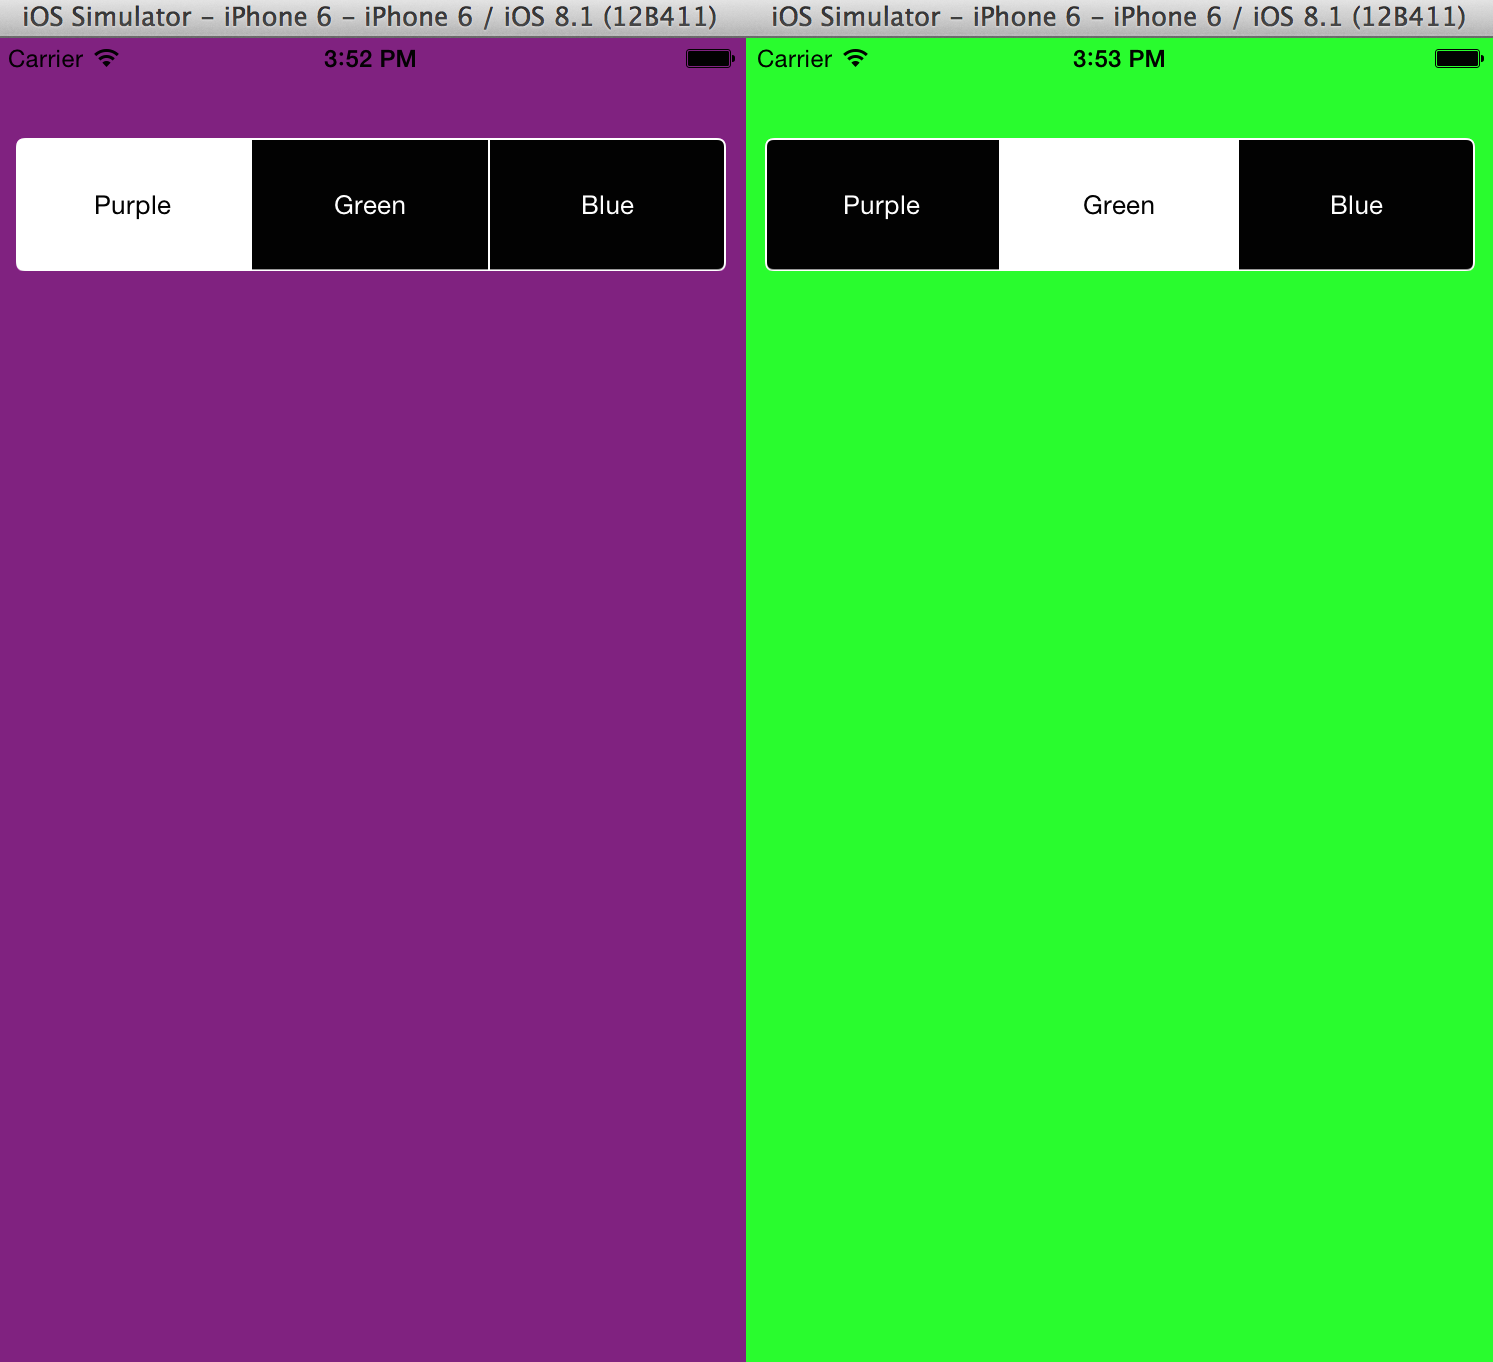
Again, this is all programmatically done rather than using the storyboard to add and configure the Segmented Control.
Taking Control of the View
Since everything will be programmed, we will not be touching AppDelegate.swift file nor the Main.storyboard
file that are created. Our main file that we will work in is the ViewController.swift. Our first objective is
that we need to take control of the loadView function in the ViewController since we are adding subviews to
the default view. By doing this, we can add the necessary components that we want before the view has loaded.
In ViewController.swift start off by adding the following override function:
/**
  Loads the view and in our case we override default loadView to provide
  custom SegmentedControl.
*/
override func loadView() {
  super.loadView()
  self.view.backgroundColor = UIColor.purpleColor()
}
Here we first have our default super class loadView run in order to generate the default view settings that
is already configured. This allows you to have access to self.view which is needed so we can add our own custom
subviews to it. Finally, we changed the default background color to purple.
If you take out the line
super.loadView()you will have a bad access onself.view. Try it out! Since we never defined the view to be loaded, this is done by the default configuration of the project so we do not want to break that part of the code.
Adding the Segmented Control
Programming the segment control has 4 major steps that must be done:
- Initialize the Segmented Control object which is
UISegmentedControlwith populated items for each segment. a. Set the initial segment that is selected. - Update the frame for the Segmented Control to render in.
- Add a target for what to do when a new segment is chosen.
- Add the Segmented Control as a subview of the main view.
The following sections will discuss code to add at the end of the loadView() function, so to be concise, I will
not show the before and after code. However, if you get confused, you can always look at the end result code
at the end of this tutorial.
Initialization
Start off by defining the items array which contains an array of strings for the titles of your segments. Next,
initialize a UISegmentedControl with this items array.
// Initialize
let items = ["Purple", "Green", "Blue"]
let customSC = UISegmentedControl(items: items)
customSC.selectedSegmentIndex = 0
Set the Frame
Next, we need to set up the frame that the subview renders in. We will grab the bounds for the view, then adjust the frame to be near the top of the view and since the bounds give the full height of the screen, we will use only 10% of it for our SegmentedControl.
// Set up Frame and SegmentedControl
let frame = UIScreen.mainScreen().bounds
customSC.frame = CGRectMake(frame.minX + 10, frame.minY + 50,
                            frame.width - 20, frame.height*0.1)
Styling (Optional)
You really don't need this section but if you want to end with the same results as me, then you can add some styling to the Segmented Control as follows:
// Style the Segmented Control
customSC.layer.cornerRadius = 5.0  // Don't let background bleed
customSC.backgroundColor = UIColor.blackColor()
customSC.tintColor = UIColor.whiteColor()
Add Target
The target that you need to add is basically connecting the Segmented Control with a method so that
iOS knows what to do when a given control event is performed. The main control event used is
.ValueChanged which is triggered whenever the segment selection is changed.
// Add target action method
customSC.addTarget(self, action: "changeColor:", forControlEvents: .ValueChanged)
We will define the actual handler later, for now understand though that it will be called changeColor
so if you wanted to have segmentControlHandler as your function name then have
action: "segmentControlHandler:" instead.
Add Subview
Finally we need to add the Segment Control as a subview to our main view:
// Add this custom Segmented Control to our view
self.view.addSubview(customSC)
Segment Control Action Handler
Now that we've finished creating the Segment Control, we will now define a new function. This is no longer
part of the loadView function, but still in the ViewController. This is the "target" that we needed
for the addTarget call on the segment control. So anywhere in the file, you can define it as follows:
/**
  Handler for when custom Segmented Control changes and will change the
  background color of the view depending on the selection.
 */
func changeColor(sender: UISegmentedControl) {
    switch sender.selectedSegmentIndex {
    case 1:
        self.view.backgroundColor = UIColor.greenColor()
    case 2:
        self.view.backgroundColor = UIColor.blueColor()
    default:
        self.view.backgroundColor = UIColor.purpleColor()
    }
}
The major parts of this function is that the sender will be a UISegmentedControl and in order
to determine which segment is selected you can access the sender.selectedSegmentIndex property.
From there, the segments are zero-indexed so "Purple" is 0, "Green" is 1, and "Blue" is 2 which
we've matched in our switch case and are setting the view's background color based on the
selection.
Note: Setting the view's background color will trigger setNeedsDisplay() to be called on
the view so that it gets reloaded. Thus, you don't have to worry about it yourself though the
best you should understand is that if the view needs to be regenerated due to any changes that
it generally needs to have setNeedsDisplay() so that the iOS program knows to re-render the
view.
Final Product
That's it! I hope that is insightful as it was a fun exercise to do. Let me know if you have any questions or comments. I have a project posted on GitHub as well which you can download and play with as well and you can go to it by clicking here.
Here is the final code for the ViewController.swift with some added print statements to see in
the console when running a simulation:
import UIKit

class ViewController: UIViewController {

  /**
    Loads the view and in our case we override default loadView to provide
    custom SegmentedControl.
  */
  override func loadView() {
      super.loadView()
      self.view.backgroundColor = UIColor.purpleColor()

      println("Main view's loadView() called.")

      // Initialize
      let items = ["Purple", "Green", "Blue"]
      let customSC = UISegmentedControl(items: items)
      customSC.selectedSegmentIndex = 0

      // Set up Frame and SegmentedControl
      let frame = UIScreen.mainScreen().bounds
      customSC.frame = CGRectMake(frame.minX + 10, frame.minY + 50,
                                  frame.width - 20, frame.height*0.1)

      // Style the Segmented Control
      customSC.layer.cornerRadius = 5.0  // Don't let background bleed
      customSC.backgroundColor = UIColor.blackColor()
      customSC.tintColor = UIColor.whiteColor()

      // Add target action method
      customSC.addTarget(self, action: "changeColor:", forControlEvents: .ValueChanged)

      // Add this custom Segmented Control to our view
      self.view.addSubview(customSC)
  }

  /**
    Handler for when custom Segmented Control changes and will change the
    background color of the view depending on the selection.
   */
  func changeColor(sender: UISegmentedControl) {
      println("Change color handler is called.")
      print("Changing Color to ")
      switch sender.selectedSegmentIndex {
      case 1:
          self.view.backgroundColor = UIColor.greenColor()
          println("Green")
      case 2:
          self.view.backgroundColor = UIColor.blueColor()
          println("Blue")
      default:
          self.view.backgroundColor = UIColor.purpleColor()
          println("Purple")
      }
  }

  override func viewDidLoad() {
      super.viewDidLoad()
      // Do any additional setup after loading the view, typically from a nib.
  }

  override func didReceiveMemoryWarning() {
      super.didReceiveMemoryWarning()
      // Dispose of any resources that can be recreated.
  }
}
Have fun developing! Let me know if there are any issues with this tutorial. Thanks!
comments powered by Disqus